Showing posts with label Separates. Show all posts

Tuesday, July 2, 2013

Free Pattern: Sweet Nana Pajamas!


Hey guys, I'm back! Apologies for being away, it's been too long, and hopefully this makes up for it. My grandmother spent a week at the hospital for an operation, and was just discharged yesterday. My mom asked me if I could get some material to make my grandma some pajamas to wear at home once she gets discharged-- her current pajamas was too short on the legs and too tight on the waistband, and the sleeves of the blouse was too long. 


Since my grandmother spent a few days floating in and out of sleep at the hospital while the anaesthetic wore off while being in pain from the surgery scars, we couldn't really take her measurements so we decided to base the pattern off one of her pajama sets.


The sleeve was drafted using Winifred Aldrich's book (bless her)-- I tried googling for a shortcut easy way to draft sleeves (haha lazy me) and found this video by Fettucinnetube, but after drafting it and showing it to my mom, she said it looked weird and I had to agree. If anyone's tried the Fettucinnetube technique, let me know if it worked for you. I ended up drafting the sleeve the correct way with the Aldrich book and am glad I did it coz the fit is nice!


I drew the pattern in Illustrator and was in such a hurry to finish it because my grandmother was discharged a day earlier than we anticipated. Sooo the pattern isn't perfect by industry standards (you will have to have experience in sewing pattern pieces together), but hopefully it will make sense and be of help to anyone who is looking for some pajamas to lounge around in.


After sewing it, I shortened the sleeves by 9cm from the hem (the pattern's sleeves would sit at the elbow-- an oversight of mine during the drafting process as I had forgotten that my grandmother wanted shorter sleeves, oops). 


It's made for size XL, and I would recommend lightweight fabrics such as cotton, rayon, satin, polyester, as long as they feel good against your skin (a good excuse to play with the fabric like a cat at the fabric store).


The pattern is available for free as a print at home copy. The top/blouse prints on 30 pages, and the pants pattern prints on 20 pages. 1cm seam allowance (SA) is included, and there are guides to help you line up the pages to stick them together. More instructions on the pattern pdfs.

I sewed a little satin ribbon on the front of the pants as a reminder of which way's the front. Though, technically, since the crotch curve of this pants is pretty low (nobody should wear tight crotched pants as pajamas, please just don't), the pants can be worn either way.

Download the PDF patterns here:
Sweet Nana Pajamas (Top)
Sweet Nana Pajamas (Pants)

Feel free to use it to sew a loved one some pajamas! This is my first pattern that I'm sharing here, so please share it and let me know if you like it. If you have any questions, do leave a comment or tweet to me at @chiiiiing (5 i's). Enjoyyyy! :D


Sunday, January 27, 2013

Draped lycra slip and tips on getting a dress form

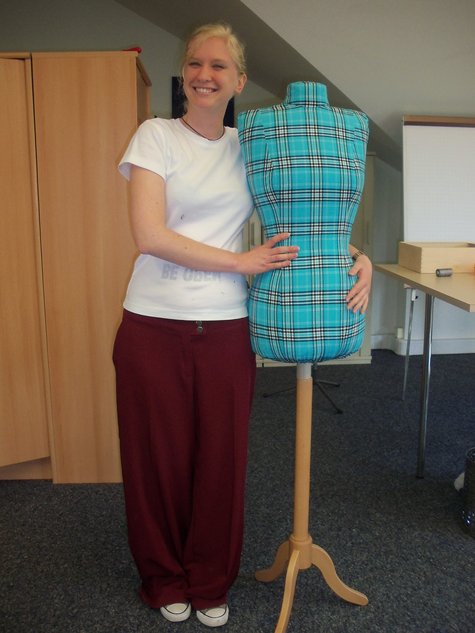
Sometime last year, I finally decided to get myself a dress form, and got mine from Leichio in Thailand. I posted this pic below on the day I received the package, and christened her Sha Nay Nay thanks to one of my Youtube favorites: Top 60 Ghetto Black Names

Yeah, I was so happy I felt like hugging her to sleep!

For my first ever project with Sha Nay Nay, I made a Lycra slip to wear under my dresses. The fabric is soft, so I can also wear it as a long tank top on its own.


Check out my boobies.


Just kidding, they're Sha Nay Nay's! Heh. Now stop checking out her cleavage! :P


This slip was fully draped on Sha Nay Nay, so no paper pattern pieces. I learned some pros and cons, which I'll get to below.


The edges were finished with small zig zag stitches, as I didn't want anything too bulky.


Here you can see one of Sha Nay Nay's adjustable dials, just like a cyborg eh?


Having a dress form has really helped me in my sewing adventures. It cuts down fitting time, and I'm able to create patterns from draping directly onto the form, like I did on the wedding dress. Here are some tips for getting your own dress form.


Tips on buying/making dress forms

If you sew for yourself and others...
1. Consider getting an adjustable dress form that falls within your measurements. Amazon sometimes has discounts-- while searching I found that the common size was M, and they were cheaper than the other sizes.
2. Check if the tailor form is pin-able. A pin-able form is needed for draping designs (some pin all the way into the body, and some pin halfway meaning you will have to angle the pin at a slant to push it in)


If you only sew for yourself...
1. Measure your body measurements (key areas: bust, waist, hips) and try to look for one closest to your size. It may be easier to buy a slightly smaller one and pad it up later to match your measurements, rather than buying a bigger one which might not help much with your fitting.
2. It won't be essential to have an adjustable dress form, so you get to save some money there :)
3. Like the above, check if the tailor form is pin-able.
4. Make your own! Here are a few ideas:


Shannon's duct tape dress form, made mostly on her own with the help of her adorable son. The thing I like about her version is that she filled the insides with spray foam.


Threads' mama got swag paper tape dress form


Sartorial DIY's amazing plaster bandages dress form. One word: WOAH!!


lazylinchen's sloper dress form filled with sawdust... another of my favorites!
Do you have a dress form, and if not would you be interested to make one on your own?

Tuesday, June 5, 2012

The modified Ellen


I made me a new pair of pants, thanks to Burdastyle's Ellen! The fabric was from my mom's stash, and I finished it with a vintage button-- a gift from my mom's friend. I forgot to take a picture of the button, but here's one from my Instagram:


So cute, right? And the colors totally match the floral fabric! :D


I tapered the legs of the pattern so it has a skinnier look.


The crotch curve is pretty decent on this pattern! I eliminated the pockets in the original pattern as well, and will probably draft new pockets when I make these pants again.


I'm so happy with the way it turned out.. I've always wanted floral pants and now I can haz one. With some simple modifications, I think Ellen is a keeper ;-)